As an experienced Oil Seal Manufacturer, TEBIETE understands that correct storage is essential for preserving sealing performance, preventing premature aging, and reducing purchasing losses. The guidance below covers the storage conditions, tools, inspection methods, stock rotation practices, and common mistakes that purchasing and maintenance teams need to control.
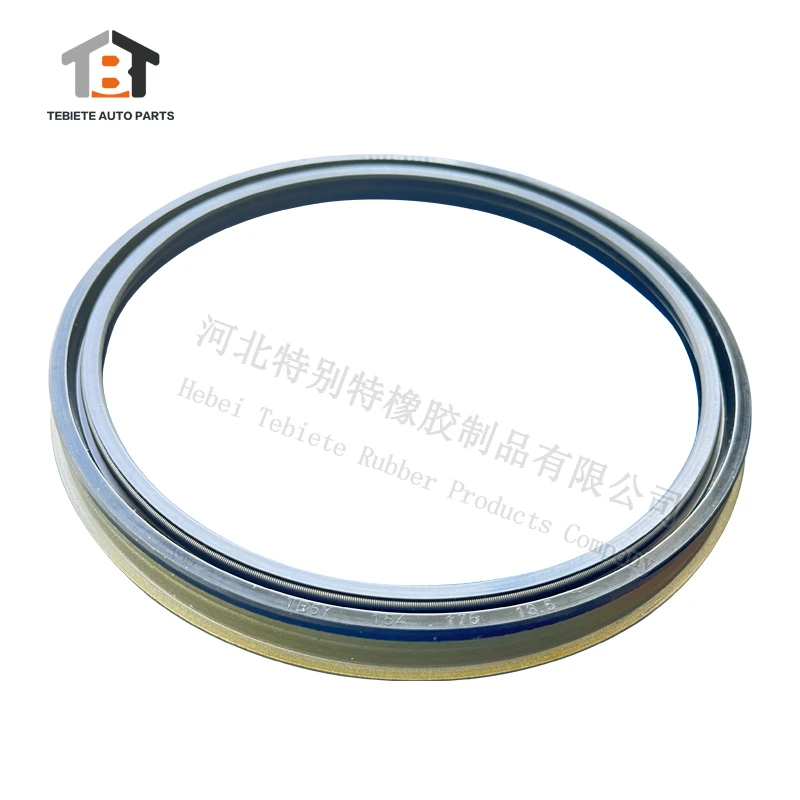
Store oil seals in a clean and controlled environment.
Choose a cool, dry, and stable storage room.
Oil seals are commonly made from elastomers such as NBR, FKM, EPDM, silicone, or polyurethane. These materials can lose their sealing properties when exposed to excessive heat, moisture, sunlight, ozone, dust, or chemical vapors. Select an indoor storage area that remains stable throughout the year.
- Keep the temperature preferably between 15 and 25 C.
- Avoid temperatures above 30 C for long-term storage.
- Keep relative humidity preferably below 65 percent.
- Prevent condensation caused by rapid temperature changes.
- Keep the room clean, dry, and free from oil mist, solvents, acids, and corrosive gases.
- Keep products away from boilers, heaters, motors, welding areas, and hot pipelines.
- Use a thermometer and hygrometer to record storage conditions.
Protect seals from direct light and ozone.
Ultraviolet light can harden or crack elastomer compounds. Ozone can attack exposed rubber surfaces and create fine cracks, especially around the sealing lip. Store oil seals in a dark area or inside their original opaque packaging.
- Do not place seals near windows or skylights.
- Do not use fluorescent lighting directly above open cartons for extended periods if the products are exposed.
- Keep seals away from electric motors, generators, transformers, and other ozone-producing equipment.
- Close storage cabinets and cartons after every inspection.
Keep oil seals in their original protective packaging.
Do not remove packaging before installation.
The original bag, box, divider, or protective film helps prevent dust contamination, deformation, light exposure, and accidental mixing of sizes. Purchasing teams should require suppliers to provide sealed packaging with clear identification labels.
- Leave each oil seal in its original individual bag whenever possible.
- Keep the manufacturer label attached to the package.
- Do not combine different sizes or materials in one unmarked container.
- Use clean polyethylene bags or approved protective packaging if the original package is damaged.
- Do not wrap rubber seals tightly with wire, tape, or elastic bands.
- Do not place loose seals directly on concrete floors, metal shelves, or dirty workbenches.
Use correct packaging for large or sensitive seals.
Large diameter seals and seals with thin lips can deform under their own weight or under pressure from other parts. Use individual dividers, flat trays, or support rings to prevent bending and compression.
- Store large seals flat only when the design and packaging support this position.
- Use vertical storage for seals that may flatten when stacked, provided they are fully supported and not bent.
- Never fold, twist, or sharply bend an oil seal to save space.
- Use separators between different sizes and compound types.
- Keep metal-cased seals from striking each other during movement.
Use the right tools for inspection and stock control.
Prepare basic storage and inspection tools.
A controlled storage system does not require complicated equipment, but the tools must be clean, accurate, and used consistently. The following list supports routine receiving, inspection, and inventory management.
- Clean nitrile gloves or lint-free gloves.
- Digital thermometer.
- Digital hygrometer.
- Clean, soft inspection cloth.
- Non-metallic ruler or caliper for dimensional checks.
- Magnifying glass for checking cracks and surface defects.
- Clean storage trays, dividers, and shelves.
- Waterproof labels and permanent markers.
- Barcode scanner or inventory management system.
- Inspection checklist and storage condition log.
- Camera for recording damaged packaging or questionable products.
- Approved cleaning materials that do not contain solvents harmful to elastomers.
Inspect seals without damaging them.
Inspection should identify storage damage without introducing new contamination. Handle the seal with clean gloves and inspect the sealing lip, outer diameter, inner diameter, metal case, spring, and package condition.
- Check for cracks, cuts, tears, hardening, swelling, tackiness, flattening, or discoloration.
- Check whether the garter spring is present and correctly positioned.
- Check whether the metal case is dented, rusty, or separated from the rubber.
- Check whether the sealing lip is twisted or permanently deformed.
- Check whether the package is wet, torn, dusty, or missing its identification label.
- Do not use sharp tools to open packages or reposition the lip.
Follow a step-by-step oil seal storage procedure.
First step: Receive and identify the products.
Record the product information immediately when the shipment arrives. This prevents unidentified stock from entering the warehouse and makes later traceability possible.
- Compare the purchase order with the delivery documents.
- Confirm the oil seal part number, size, material, quantity, and application.
- Record the supplier, manufacturing batch, production date, and delivery date when available.
- Check whether the package labels match the documents.
- Place damaged or unidentified packages in a designated quarantine area.
Second step: Inspect the packaging and seal condition.
- Check the outer carton for water damage, punctures, crushing, or contamination.
- Open a sample package using clean hands and suitable tools.
- Inspect the rubber lip for cracks, deformation, hardening, swelling, or foreign particles.
- Inspect the metal case and spring for corrosion or mechanical damage.
- Record any abnormal condition with photographs and an inspection report.
- Ask the supplier for a technical disposition before using questionable products.
Third step: Label and classify the inventory.
- Assign a storage location based on part number, material, size, and application.
- Label every shelf, bin, tray, or carton clearly.
- Separate new stock, opened stock, inspected stock, and quarantined stock.
- Mark products with special requirements, such as FKM or silicone seals.
- Record the received date and recommended review date in the inventory system.
Fourth step: Place the seals in suitable storage positions.
- Place the original package on a clean shelf away from direct sunlight.
- Keep cartons off the floor by using pallets or shelving.
- Store heavy cartons below light cartons to avoid crushing.
- Use dividers to prevent contact between different seal sizes and materials.
- Keep the sealing lip free from pressure and avoid bending the part.
- Close the package after every inspection or issue transaction.
Fifth step: Monitor the storage environment.
- Measure temperature and humidity at least once per working day in critical warehouses.
- Record readings in a log or digital monitoring system.
- Investigate sudden changes, condensation, water leaks, or heating problems.
- Move stock temporarily if the room becomes too hot, wet, dusty, or exposed to ozone.
- Inspect the storage area for chemical vapors and sources of ultraviolet light.
Sixth step: Rotate stock using a controlled issue method.
Use the first-in, first-out method unless a documented technical requirement specifies another method. Stock rotation reduces the risk of forgotten inventory and helps the purchasing team identify slow-moving products.
- Issue the oldest acceptable batch first.
- Keep newer shipments behind older shipments.
- Review slow-moving and long-stored products at scheduled intervals.
- Do not mix batches in an unmarked container.
- Update the inventory record after every issue, return, or relocation.
Seventh step: Reinspect before installation.
- Confirm that the part number and dimensions match the equipment requirement.
- Check the package and seal for damage caused during storage or transport.
- Confirm that the material is suitable for the fluid, temperature, pressure, and shaft speed.
- Clean the seal with an approved lint-free cloth if necessary.
- Do not install a seal that has cracks, permanent deformation, severe hardening, corrosion, or an unknown storage history.
- Record the batch number when the seal is issued for critical equipment.
Manage shelf life and long-term storage carefully.
Understand that storage life depends on material and conditions.
Oil seal shelf life is influenced by the elastomer compound, reinforcement materials, spring material, packaging, temperature, humidity, light, ozone, and chemical exposure. A seal stored in ideal conditions may remain usable for a long period, while the same seal can deteriorate quickly in a hot or contaminated warehouse.
- NBR seals are widely used but should be protected from heat, ozone, and direct sunlight.
- FKM seals generally tolerate higher temperatures but still require protection from light, contamination, and deformation.
- EPDM seals should be protected from incompatible oils and chemicals, even during storage.
- Silicone seals should be protected from dust and mechanical damage because their surfaces can attract contamination.
- Polyurethane seals should be protected from humidity, heat, and unsuitable packaging conditions.
Apply a periodic review schedule.
Purchasing and warehouse teams should establish a documented review interval based on the seal material, application criticality, and supplier recommendations. A periodic review is more reliable than assuming that an old package is still acceptable.
- Review packaging condition at least annually for normal stock.
- Review critical or high-value seals more frequently.
- Inspect long-stored seals before issuing them to production.
- Use batch records to identify products approaching the internal review limit.
- Request a technical evaluation from the supplier when the storage history is incomplete.
Quarantine products with uncertain history.
Do not return questionable seals to normal stock simply because they look acceptable. A seal may have lost elasticity or developed internal damage that is not visible during a basic visual inspection.
- Place products with missing labels in a clearly marked quarantine location.
- Separate seals exposed to water, excessive heat, chemicals, or ozone.
- Do not mix approved and unapproved batches.
- Request material certificates, storage records, or supplier inspection results when necessary.
- Dispose of rejected seals according to company and environmental procedures.
Match storage controls to purchasing and maintenance risks.
Prevent wrong-part purchases and inventory duplication.
A common purchasing problem is ordering a technically similar seal that has the wrong dimensions, compound, spring design, or metal case. Clear identification and organized storage reduce emergency purchases and production delays.
- Record the shaft diameter, housing diameter, width, seal design, material, and temperature range.
- Keep manufacturer part numbers and equivalent part numbers linked in the inventory system.
- Use photographs and technical drawings for non-standard seals.
- Separate metric and inch sizes.
- Separate seals with similar dimensions but different materials or lip designs.
Control supplier quality and traceability.
Purchasing teams need evidence that the product was manufactured, packed, and stored correctly before delivery. This is especially important for seals used in hydraulic systems, gearboxes, pumps, automotive equipment, and other failure-sensitive applications.
- Request product specifications and material information.
- Request batch or lot identification on the packaging.
- Confirm packaging requirements before placing a large order.
- Ask for storage and shelf-life recommendations for special compounds.
- Evaluate whether the supplier can provide consistent dimensions and material quality.
- Keep inspection and nonconformance records for future supplier evaluation.
Reduce downtime caused by unavailable or damaged stock.
Incorrect storage often creates an apparent inventory shortage because products become unusable before they are issued. A minimum stock level, organized location system, and regular condition review help maintenance teams find serviceable seals when they are needed.
- Set minimum and maximum stock levels for critical part numbers.
- Identify seals used in high-failure or high-downtime equipment.
- Store emergency replacement seals in a protected and clearly marked location.
- Review consumption data before placing repeat orders.
- Use stock rotation to prevent old inventory from remaining at the back of the warehouse.
Avoid common oil seal storage mistakes.
Do not store seals near heat, sunlight, or ozone sources.
Heat accelerates elastomer aging, sunlight promotes surface degradation, and ozone can cause cracking. Moving a carton away from a window is not enough if the product remains near an electric motor or a hot machine.
Do not stack heavy parts on top of seal cartons.
Pressure can flatten the sealing lip, deform the outer diameter, or damage the metal case. Use dedicated shelves and place heavy packages at lower levels.
Do not store seals loose in dirty drawers or bins.
Dust and metal particles can damage the sealing lip during installation. Loose storage also causes part mixing, missing labels, and incorrect selection.
Do not wash seals with solvents before storage.
Solvents can extract additives, swell rubber, dry the surface, or change the material properties. Keep seals clean through controlled packaging rather than aggressive cleaning.
Do not fold or stretch seals to fit a container.
Permanent deformation may prevent the sealing lip from contacting the shaft correctly. Select a container large enough to support the seal in its natural shape.
Do not rely only on visual appearance.
A seal can look normal while having reduced elasticity or an unknown storage history. Review batch records, storage conditions, material compatibility, and supplier documentation before using products in critical equipment.
Do not mix different materials and sizes.
NBR, FKM, EPDM, silicone, and polyurethane seals may look similar but have different chemical and temperature limits. Separate them clearly and use part-number verification before issue.
Use a practical oil seal storage checklist.
Complete the receiving checklist.
- Part number matches the purchase order.
- Dimensions and material are identified.
- Quantity is correct.
- Packaging is dry, sealed, and undamaged.
- Batch or lot information is recorded.
- Products with damage or missing information are quarantined.
Complete the warehouse checklist.
- Temperature is within the approved storage range.
- Humidity is controlled and recorded.
- Products are protected from sunlight and ozone.
- Seals remain in original packaging.
- Products are stored away from chemicals and heat sources.
- Cartons are supported and not overloaded.
- Different sizes and materials are separated.
- FIFO rotation is being followed.
Complete the pre-installation checklist.
- Correct part number and size are confirmed.
- Material is compatible with the application.
- Sealing lip has no cracks, cuts, or deformation.
- Metal case and spring are undamaged.
- Seal has not been exposed to unsuitable storage conditions.
- Installation tools and shaft surfaces are ready.
- Any questionable product has been removed from service.
Proper storage protects the performance, service life, and traceability of every seal in your inventory. By controlling temperature, humidity, light, ozone, packaging, handling, stock rotation, and inspection records, purchasing groups can reduce waste and prevent equipment downtime. TEBIETE, as a dependable Oil Seal Manufacturer, supports customers with properly identified sealing products and practical technical guidance for storage and application.


