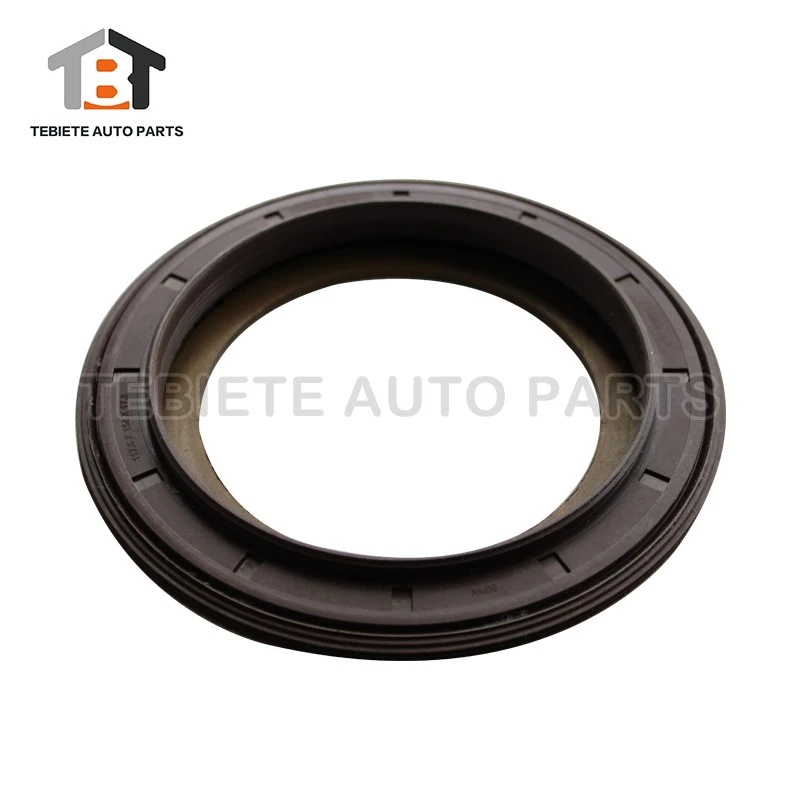
An Axle Oil Seal is a small but critical component that keeps differential and gear oil inside the axle housing while preventing dirt and water from entering. When the seal fails, oil can reach the brake assembly, damage bearings, reduce lubrication, and create a serious safety risk. This guide explains how to identify, prevent, and repair truck axle oil leakage with practical inspection steps, required tools, maintenance advice, and common mistakes to avoid.
For reliable sealing performance, fleet managers and repair technicians can also evaluate heavy-duty sealing products from TEBIETE, available at TEBIETE.
Understand Why Truck Axle Oil Leaks
Inspect the most common axle leak locations
Before repairing a leak, identify exactly where the oil is escaping. Oil may appear around several different components, and oil running along the axle housing can make the original leak point difficult to see.
- Wheel-end Axle Oil Seal: Oil appears around the wheel hub, brake backing plate, or inside the brake drum.
- Pinion seal: Oil leaks from the front of the differential where the driveshaft connects.
- Axle shaft seal: Oil appears near the axle tube or inner wheel-end area.
- Differential cover gasket: Oil leaks around the edge of the differential housing cover.
- Fill or drain plug: Oil seeps from damaged threads, a missing gasket, or an improperly tightened plug.
- Breather assembly: Oil is pushed out through a blocked or damaged axle breather.
- Housing crack: Oil leaks from a damaged weld, casting, or axle tube.
Recognize the main causes of leakage
Truck axle leakage usually results from a combination of seal wear, installation errors, excessive pressure, contamination, or incorrect lubrication. A correct diagnosis should consider the vehicle age, operating conditions, service history, and type of leakage.
- Normal seal aging caused by heat, friction, and repeated shaft rotation.
- Grooves or scoring on the axle shaft sealing surface.
- Incorrect seal dimensions or use of a low-quality seal material.
- Seal lip damage caused by a sharp shaft edge during installation.
- Blocked axle breather creating internal pressure.
- Overfilled differential oil forcing lubricant past the seal.
- Incorrect oil viscosity or a lubricant that is incompatible with the seal material.
- Loose wheel bearings causing shaft movement and seal lip wear.
- Excessive axle housing movement, misalignment, or bent components.
- Water, dust, mud, and abrasive particles entering the sealing area.
Identify the Leak Before Removing Parts
Clean the axle housing and wheel-end area
Oil and road dirt often spread over the entire axle assembly. Cleaning the area first prevents a false diagnosis and makes it easier to confirm whether the leak has stopped after repair.
- Park the truck on a level surface.
- Apply the parking brake and place wheel chocks on the wheels that remain on the ground.
- Allow the axle and brake components to cool before inspection.
- Use a suitable degreaser and a clean brush to remove oil and dirt from the axle housing, hub, pinion area, and brake backing plate.
- Wipe the cleaned surfaces with lint-free cloths.
- Do not spray degreaser directly into an open bearing, breather, or electrical connector.
Trace the oil from the highest wet point
Begin at the highest wet location and follow the oil path downward. The lowest visible drip is not always the source of the leak.
- Inspect the pinion yoke and the area around the driveshaft flange.
- Inspect the differential cover and its gasket line.
- Check the fill plug, drain plug, and plug sealing washer.
- Inspect the axle tubes for cracks, impact damage, or wet seams.
- Inspect the wheel hub and brake backing plate for oil contamination.
- Check whether the axle breather is open and securely connected.
Confirm the leak with a short road test
After cleaning, drive the truck slowly for a short distance in a safe area. Park it on a level surface and inspect the cleaned areas again. A fresh wet ring or new drop of oil usually confirms the source.
Do not continue operating the truck if oil has reached the brake linings, brake discs, or brake drums. Oil-contaminated friction material may require replacement rather than cleaning.
Prepare the Required Tools and Replacement Parts
Gather the essential tools
Having the correct tools reduces seal damage, prevents contamination, and helps the repair technician follow the manufacturer's torque specifications.
- Heavy-duty floor jack or workshop lift with the correct lifting capacity.
- Approved axle stands or support stands.
- Wheel chocks.
- Socket set and breaker bar.
- Torque wrench with the required torque range.
- Large seal puller or slide hammer, depending on the axle design.
- Seal driver or a correctly sized installation sleeve.
- Soft-faced hammer or dead-blow hammer.
- Plastic scraper or gasket removal tool.
- Clean drain pan.
- Lint-free shop cloths.
- Brake cleaner and approved degreaser.
- Non-hardening sealant if specified by the axle manufacturer.
- Feeler gauge or dial indicator for checking bearing play when required.
- Inspection light.
- Protective gloves and safety glasses.
Prepare the correct replacement parts and fluids
Use the exact replacement specification for the truck axle. A seal that fits the outside diameter but has the wrong inner diameter, lip design, spring configuration, or material may fail quickly.
- Correct Axle Oil Seal for the axle model and production year.
- New gasket or approved gasket maker for the differential cover.
- New sealing washers for drain and fill plugs when required.
- Correct axle lubricant and approved friction modifier if specified.
- New axle shaft O-rings, snap rings, or retaining clips when required.
- New brake hardware if the existing hardware is damaged or contaminated.
- Replacement bearing if inspection shows pitting, looseness, or overheating.
Replace a Wheel-End Axle Oil Seal Step by Step
First step: Secure and lift the truck
- Park the truck on a level and stable surface.
- Switch off the engine and remove the ignition key.
- Chock the wheels that will remain on the ground.
- Loosen the wheel nuts slightly before lifting the truck if the wheel design requires this.
- Lift the axle using the manufacturer's approved lifting points.
- Support the axle securely with stands rated for the truck weight.
- Remove the wheel and keep all fasteners organized.
Never work under a truck supported only by a hydraulic jack. Confirm that the truck is stable before removing the wheel, hub, or axle shaft.
Second step: Remove contaminated brake components
- Remove the brake caliper, drum, or other brake components according to the axle design.
- Support the caliper with wire or a suitable bracket. Do not let it hang by the brake hose.
- Inspect the brake friction material for oil contamination.
- Replace contaminated brake shoes or pads when required.
- Cover open hydraulic components to prevent dirt from entering the brake system.
Third step: Remove the axle shaft and hub
- Remove the axle shaft retaining bolts, flange nuts, or clips.
- Pull the axle shaft straight out to avoid damaging the splines or seal bore.
- Place the shaft on a clean surface.
- Remove the hub or bearing assembly if the seal is installed inside the hub or axle housing.
- Keep bearings and spacers in their original order if they will be reused.
If the shaft is difficult to remove, do not pry against the sealing surface with a sharp metal tool. Use the correct extraction method for the axle model.
Fourth step: Remove and inspect the old seal
- Drain any oil remaining inside the axle or hub into a clean drain pan.
- Use a seal puller to remove the old seal without scoring the housing bore.
- Clean the seal bore and surrounding area.
- Inspect the axle shaft where the seal lip contacts the shaft.
- Check for grooves, rust, burrs, pitting, or excessive wear.
- Inspect the bearing for rough rotation, discoloration, looseness, or pitting.
- Inspect the axle breather for blockage.
A new seal cannot reliably stop a leak if the shaft has a deep wear groove or the bearing allows excessive movement. Repair or replace damaged components before installing the new seal.
Fifth step: Install the new Axle Oil Seal
- Compare the new seal with the old seal for diameter, width, lip direction, and design.
- Apply a thin film of the correct axle oil to the seal lip.
- Apply grease to the seal spring only if the seal manufacturer permits it.
- Position the seal squarely in the housing bore.
- Use a seal driver or installation sleeve that contacts the strong outer edge of the seal.
- Tap the seal evenly until it reaches the specified installation depth.
- Do not strike the flexible sealing lip or the inner spring.
- Confirm that the seal is level and fully seated around its entire circumference.
Sixth step: Reassemble and refill the axle
- Lubricate the shaft sealing surface before inserting the shaft.
- Insert the shaft carefully without dragging splines across the seal lip.
- Reinstall the hub, bearing, retaining hardware, and brake components.
- Tighten fasteners using the manufacturer's torque sequence and specification.
- Install the wheel and tighten the wheel nuts to the specified torque.
- Remove the damaged drain plug washer if applicable.
- Fill the axle with the correct lubricant until the oil reaches the specified level.
- Clean the exterior surfaces again so that future leakage can be identified.
Seventh step: Test the repair
- Start the truck and release the parking brake only after confirming that all tools are clear.
- Drive slowly for several minutes without heavy loading.
- Apply the brakes gently and confirm normal braking performance.
- Park on a level surface and inspect the repair area.
- Check the lubricant level again after the axle cools if the manufacturer requires a second check.
- Record the repair date, mileage, seal part number, lubricant type, and technician observations.
Prevent Future Axle Oil Leakage
Maintain the axle breather
The breather equalizes internal axle pressure as the lubricant heats and cools. A blocked breather can force oil past the Axle Oil Seal, pinion seal, or cover gasket.
- Locate the breather on the axle housing.
- Check that the cap can move or vent as designed.
- Remove mud, paint, rust, and grease from the breather opening.
- Replace a damaged or blocked breather.
- Ensure that the breather hose is not kinked, crushed, or submerged below the axle waterline.
Control oil level and lubricant specification
- Check the axle oil level on a level surface.
- Do not overfill the differential or hub cavity.
- Use the viscosity and performance grade listed by the truck manufacturer.
- Use the correct limited-slip additive when required.
- Do not mix incompatible lubricants unless the manufacturer confirms compatibility.
- Inspect for metal particles or a burnt smell during oil changes.
Inspect wheel bearings and shaft surfaces
Excessive bearing play allows the shaft or hub to move laterally. This movement can flex the seal lip, create uneven wear, and cause repeated leakage.
- Check for wheel-end looseness during scheduled inspections.
- Rotate the hub and listen for grinding or roughness.
- Inspect bearing rollers, races, and cages for pitting or discoloration.
- Measure shaft wear where the seal lip contacts the surface.
- Use a manufacturer-approved repair sleeve when a minor groove is present and a sleeve is permitted.
- Replace severely damaged shafts instead of installing a new seal over the damage.
Protect seals during vehicle operation
- Avoid overloading the truck beyond its axle rating.
- Reduce speed on deep potholes and uneven construction roads.
- Inspect the axle after water crossings, mud work, or severe off-road use.
- Keep high-pressure water jets away from the seal lip and breather.
- Repair damaged axle housing mounts or suspension components promptly.
- Inspect for oil leaks at every preventive maintenance interval.
Match the Axle Oil Seal to the Purchasing Requirements
Check the dimensions and sealing design
Purchasing the lowest-priced seal may create repeated downtime if the product does not match the axle's operating conditions. Before ordering, confirm all technical details.
- Inner diameter and outer diameter.
- Overall seal width.
- Installation depth.
- Seal lip direction and number of sealing lips.
- Presence of a dust lip or secondary wiper lip.
- Spring material and retention design.
- Housing and shaft tolerances.
- Temperature and speed limits.
Evaluate material and operating compatibility
The sealing material must tolerate the axle oil, temperature, pressure, contaminants, and duty cycle of the truck.
- Nitrile rubber is commonly used for general mineral oil applications.
- Hydrogenated nitrile rubber may provide improved resistance to heat and demanding service conditions.
- Fluoroelastomer may be suitable for higher temperature or chemically aggressive environments when specified.
- Polytetrafluoroethylene designs may be selected for low friction or special high-performance applications.
- The final material choice should follow the axle manufacturer's specification and the seal supplier's compatibility data.
Compare supplier quality and total operating cost
Fleet purchasing teams generally need more than a part number. They need consistent dimensions, reliable delivery, technical support, traceability, and a low risk of repeat failure.
- Ask for material information and dimensional inspection records.
- Confirm production batch traceability.
- Check whether the supplier supports custom sizes or private labeling.
- Review packaging quality to prevent deformation during transport.
- Confirm minimum order quantity and lead time.
- Evaluate warranty and failure analysis support.
- Compare the cost of the seal with labor, downtime, brake cleaning, and possible roadside recovery.
- Consider a supplier such as TEBIETE when consistent sealing performance and technical cooperation are purchasing priorities.
Avoid Common Axle Seal Repair Mistakes
Do not install a seal without diagnosing the shaft
Replacing the seal alone will not solve the problem if the axle shaft has a wear groove, the bearing is loose, or the housing is misaligned. Inspect all related components before reassembly.
Do not install the seal backward
The sealing lip must face the lubricant side unless the axle manufacturer specifies a different arrangement. Confirm the orientation before pressing the seal into place.
Do not hammer directly on the seal lip
Direct impact can deform the lip, dislodge the spring, or create a small cut that becomes a leak after the truck returns to service. Always use a correctly sized driver or sleeve.
Do not reuse damaged fasteners or sealing washers
Deformed washers, stretched bolts, damaged snap rings, and worn retaining hardware can cause loose components and repeat leakage. Replace them when required by the service procedure.
Do not overfill the axle
Excess lubricant expands as temperature rises and may be forced through seals and breathers. Fill only to the specified level with the correct fluid.
Do not ignore brake contamination
Oil on brake friction material can reduce stopping performance and may not be removed completely with solvent. Inspect and replace contaminated components according to the brake manufacturer's instructions.
Do not use excessive sealant
Too much sealant can squeeze into the axle housing, detach, and block the breather or oil passages. Apply only the specified type and amount.
Use a Preventive Inspection Checklist
Complete the daily or pre-trip inspection
- Look for fresh oil around the wheel ends and differential.
- Check for oil on the inside of the wheel or brake backing plate.
- Look for a wet pinion area or oil tracks along the axle housing.
- Confirm that the axle breather is present and not visibly blocked.
- Report any new leak before the truck enters heavy service.
Complete the scheduled maintenance inspection
- Clean the axle housing before detailed inspection.
- Check lubricant level and condition.
- Inspect the differential cover and plugs.
- Check wheel bearing adjustment and end play.
- Inspect axle shafts for scoring and corrosion.
- Check the breather and hose routing.
- Verify that hub and axle fasteners are correctly torqued.
- Record any seal replacement, lubricant change, or abnormal wear.
Use a simple repair decision guide
- Light surface dampness with no active drip: clean, monitor, and schedule inspection.
- Active drip near the wheel end: replace the Axle Oil Seal and inspect brakes immediately.
- Leak with bearing looseness: repair the bearing and seal together.
- Leak with a blocked breather: restore the breather and inspect the seal for pressure damage.
- Leak from a cracked housing: stop operation and arrange structural repair or component replacement.
- Repeated leakage after seal replacement: inspect shaft wear, installation depth, alignment, oil level, and seal specification.
Final Recommendations for Long-Term Leak Prevention
Combine correct parts with correct installation
Preventing truck axle oil leakage requires more than replacing a worn component. The repair must include accurate leak diagnosis, a compatible seal, a clean installation environment, correct installation depth, proper torque, correct oil level, and a functioning breather.
Fleet owners and purchasing teams should select seals based on dimensions, material compatibility, operating temperature, contamination resistance, supplier consistency, and total maintenance cost. Technicians should document every repair and verify the result with a post-service inspection.
With the correct inspection routine and a properly installed Axle Oil Seal from a qualified supplier such as TEBIETE, trucks can reduce lubricant loss, brake contamination, bearing damage, unplanned downtime, and repeat repair costs.